This guide article will be walking you through how to set up Rules in the Assure software including the setup of Temporary Rules. You can also watch our video tutorial on how to do this.
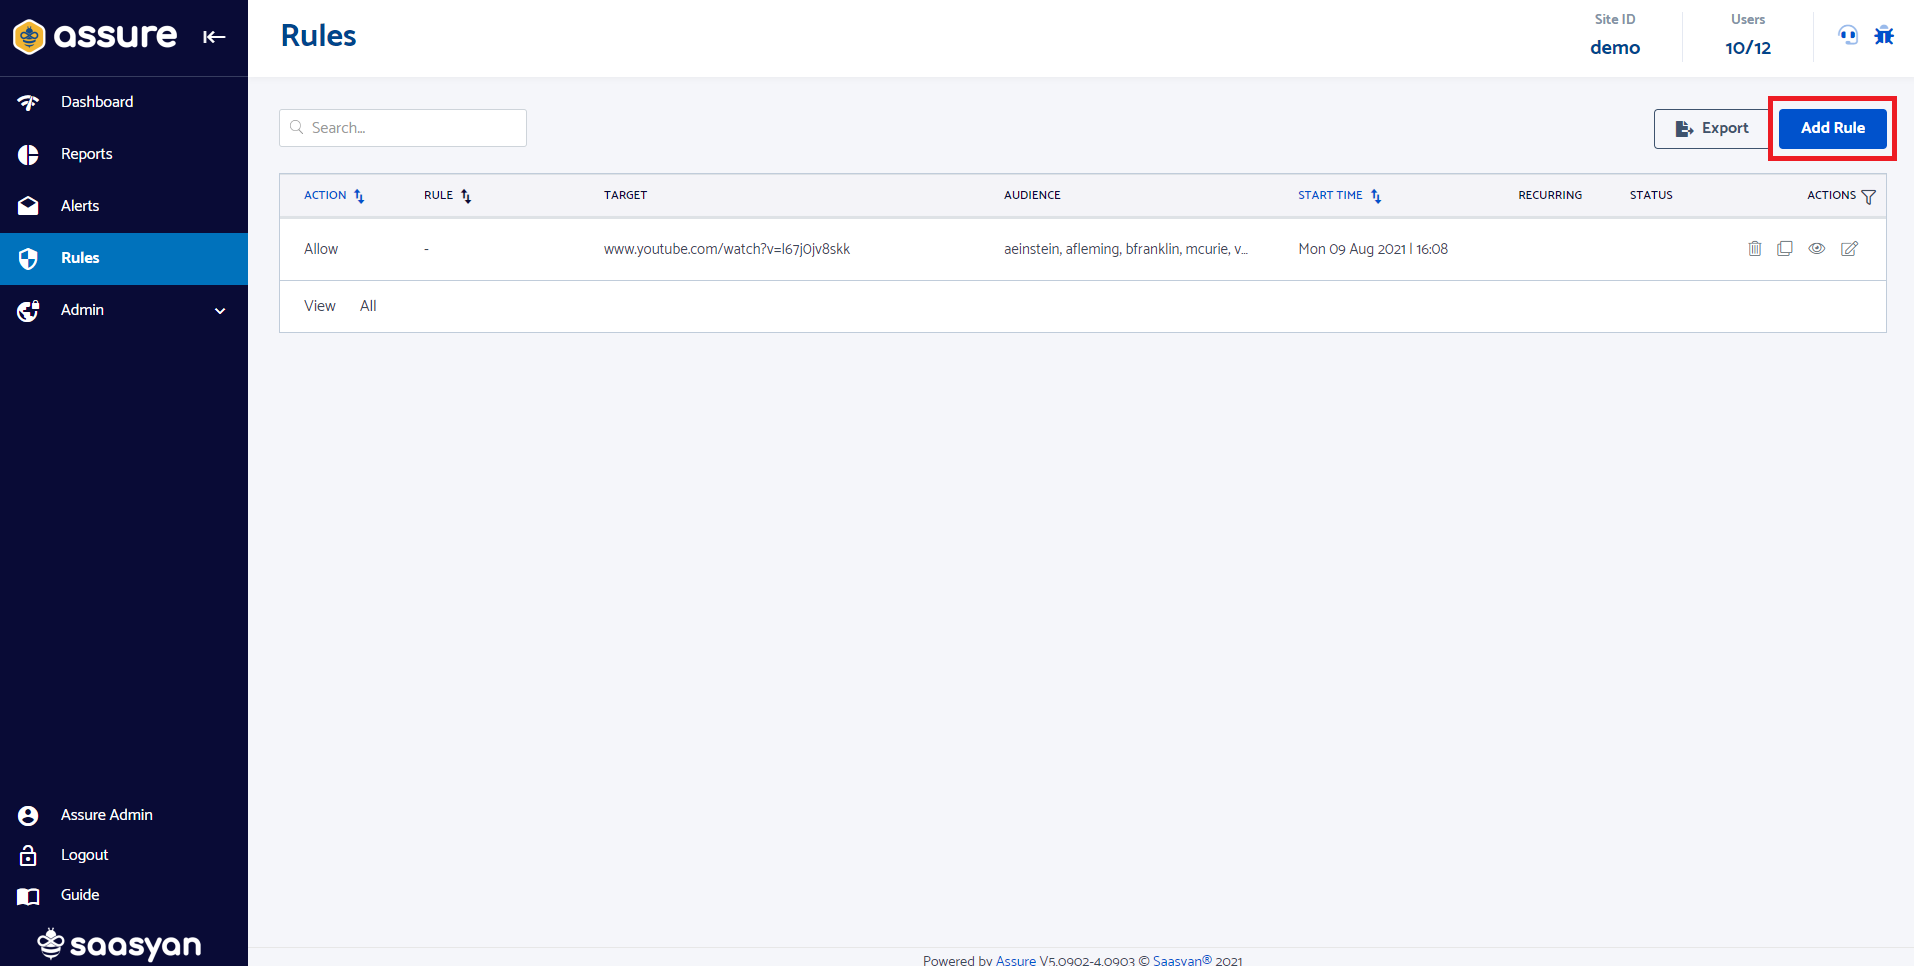
- Navigate to the Rules module.
- Click on the Add Rule button.
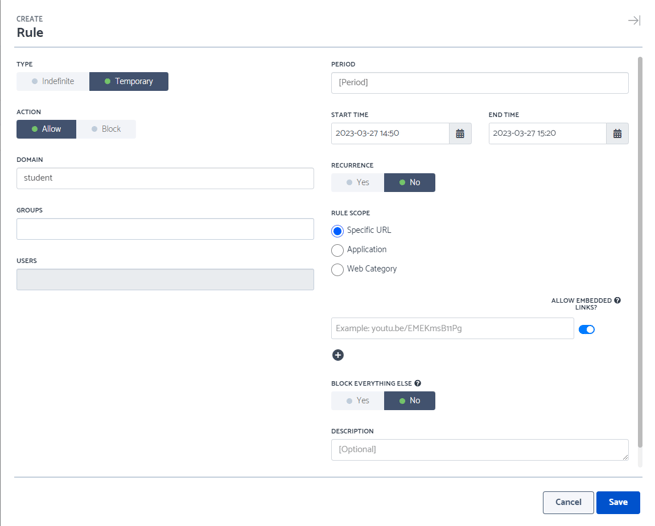
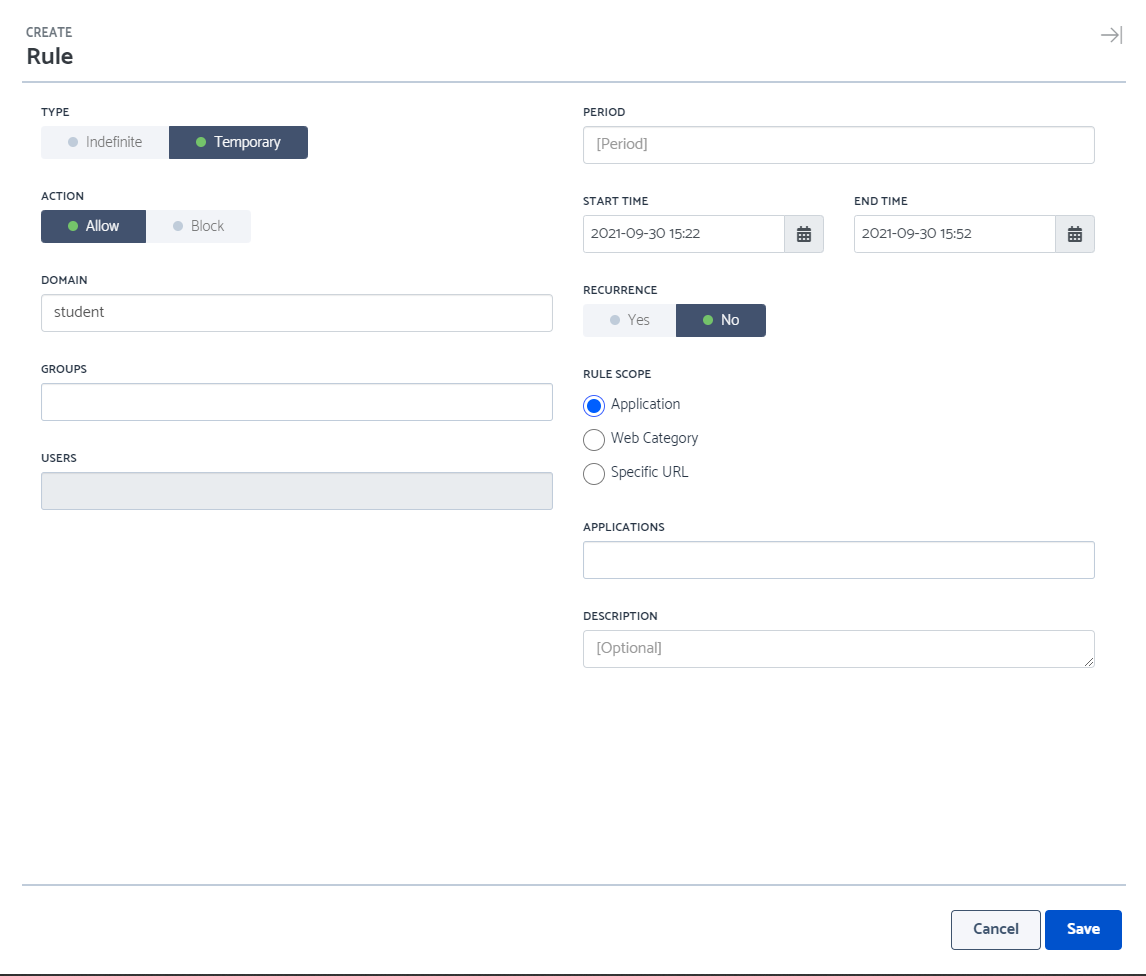
- Select the Action option for the rule - Allow or Block.
- Fill in the form fields Domain Name, Groups, and Users to indicate the group of students you would like to include for this rule.
- Select a Period if needed.
- Set the Start Time and End Time for the rule (date and time).
- Select whether you would like for this rule to be active on a recurring basis. If needed, you can select multiple days and periods of recurrence when creating a rule.
- Select the Rule Scope of web traffic or content that you would like to block or allow - Application, Web Category, or Specific URL.
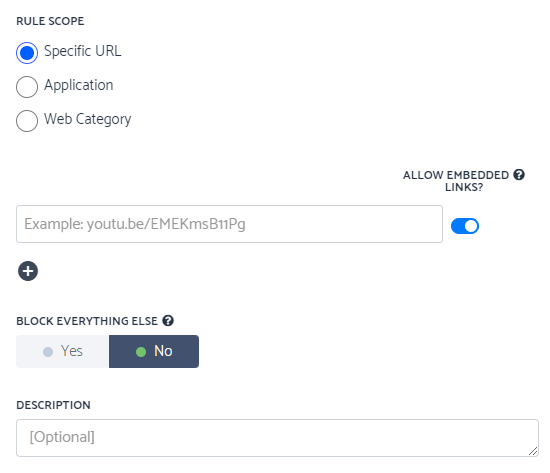
In the case of a Block Rule, you also have the option of blocking All Internet access. - If selecting the Specific URL rule scope, you can leave the Allow Embedded Links option switched on when setting up a Rule, for the software to analyse the entire webpage you have provided a link for and automatically allow/block students included for this Rule to view/from viewing all other URL's that it’s dependent on.
The Block Everything Else option (seen when selecting Web Category and Specific URL rule scopes) can be set to Yes if you want to block access to all other websites online except for this web category/URL link for the time range that you've set. Otherwise you can leave it as No.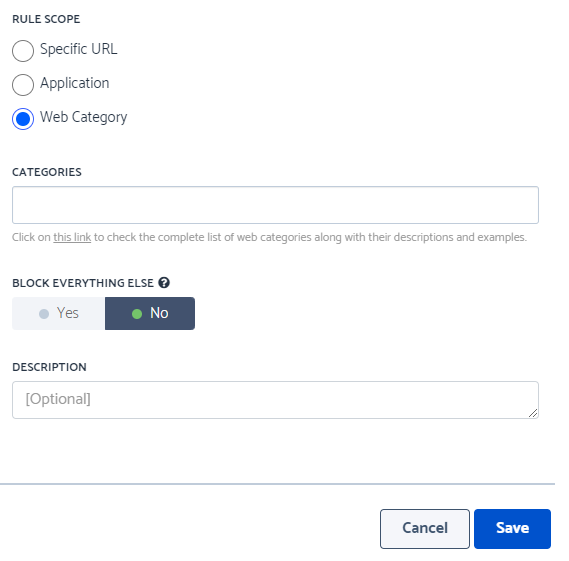
- Add a Description for the rule if needed.
- Click on the Save button and the rule will appear at the top of the page in the Rules module.

Temporary Rule setup:
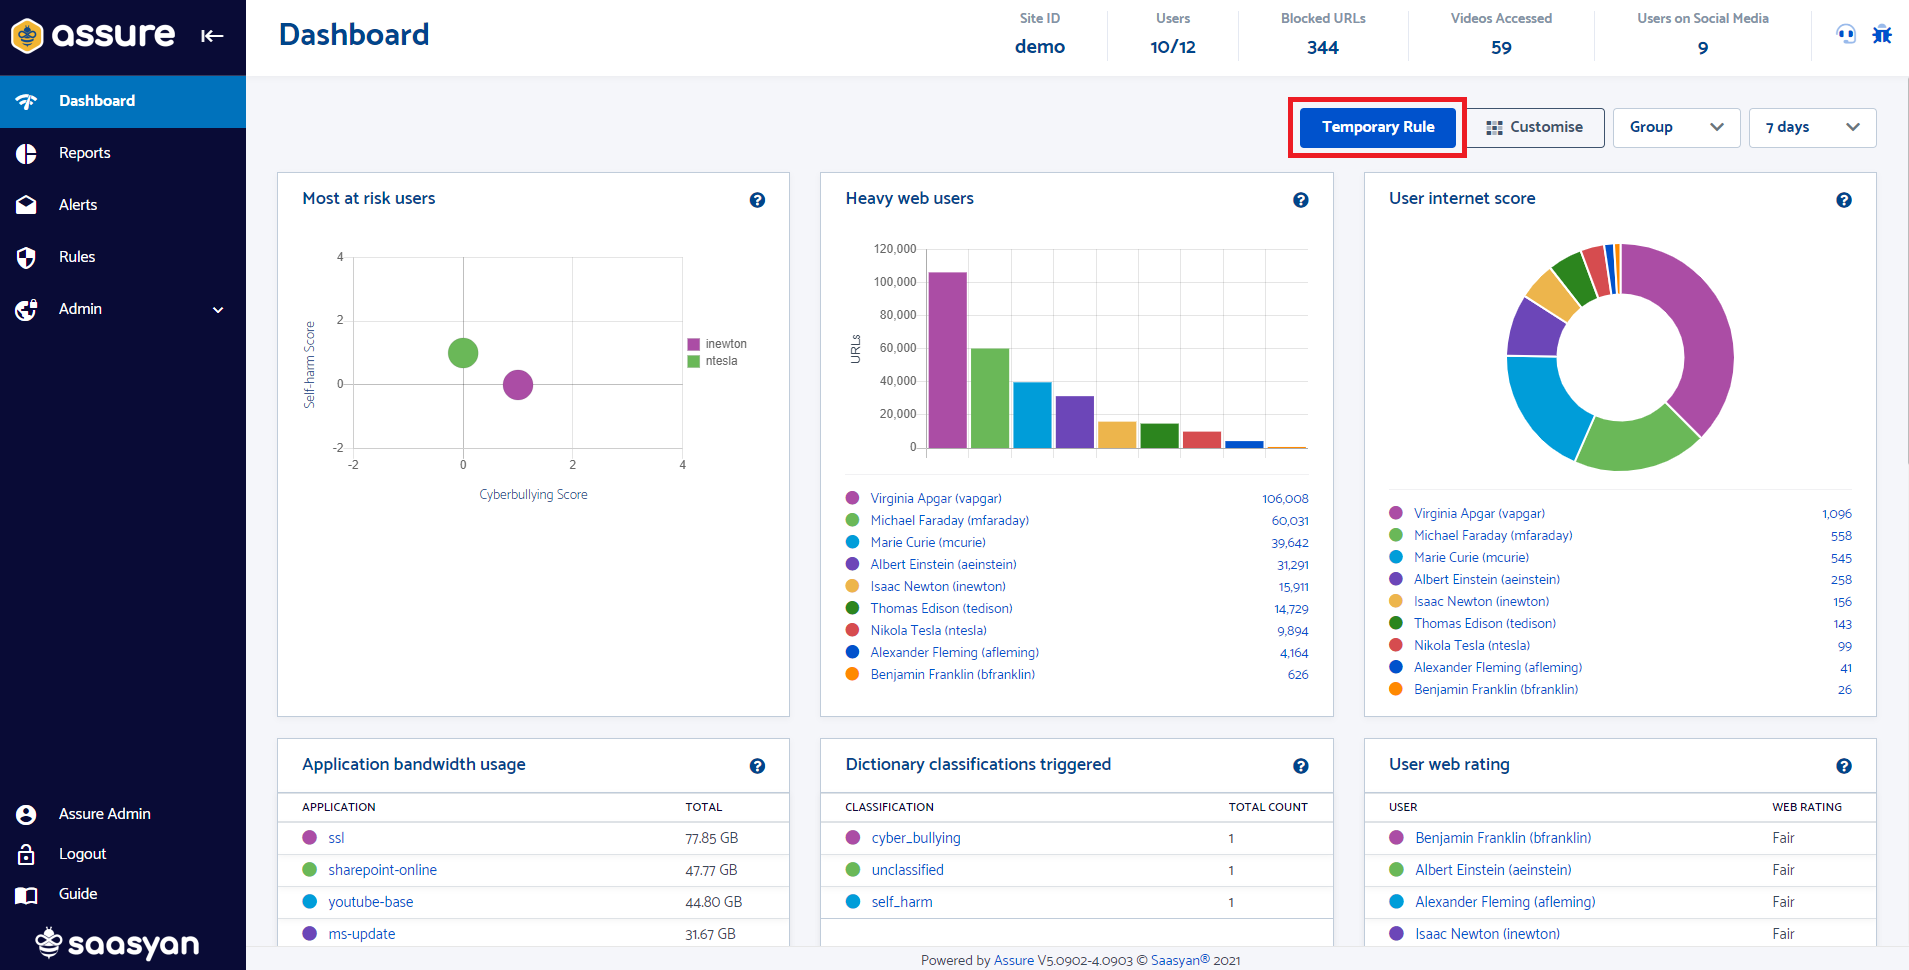
1. On the Dashboard, click the Temporary Rule button.
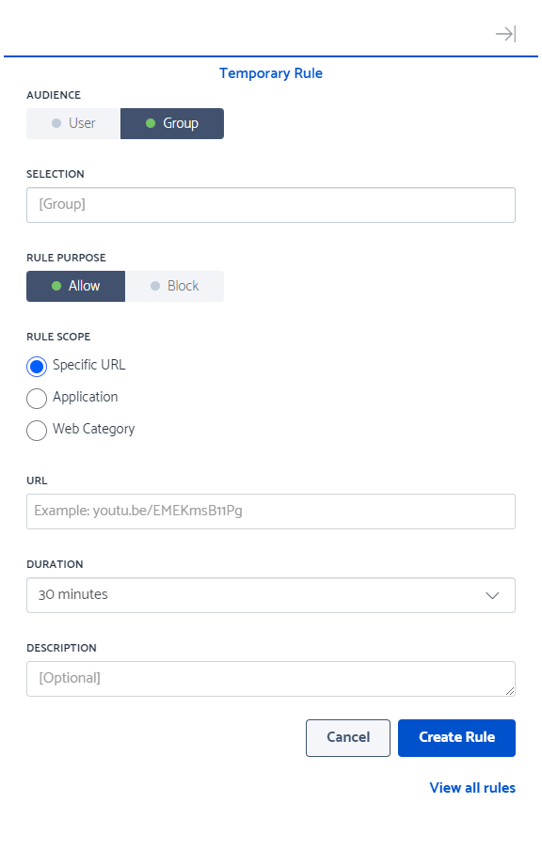
2. Select whether you want to set a rule up for Users or for Groups.
3. Select if you are Allowing or Blocking the use of an Application or the access to web content under a specific Web Category, or a Specific URL link.
4. Select from the Application, Web Category or Specific URL rule scopes based on what you would like to allow or block access to.
Then in the field below either select the application, web category, or enter the specific URL link that you would like to allow or deny access to.
5. Select the Duration period that you want to allow or block access for from the dropdown field.
6. Add a Description for the rule if needed.
7. Click the Create Rule button - this will show you the Rules page with the temporary rule that you created listed on that page.